Install and Share a ZFS pool with NFS on Ubuntu 20.04 Server

Before we can create a ZFS pool we first need to install it on our Ubuntu 20.04 Server.
1. Installing NFS
Before installing NFS we need to make shure the the Ubuntu 20.04 server is up to date by running:
sudo apt-get updateInstall NFS by typing the following command and pressing enter:
sudo apt install zfsutils-linux2. Create the ZFS Pool
Now that zfs is installed we are able to create the zfs pool and add the disks to the pool. In order to do this we first need to find out which disks we are going to add to the pool:
sudo fdisk -lThis will list the disks installed in the server:
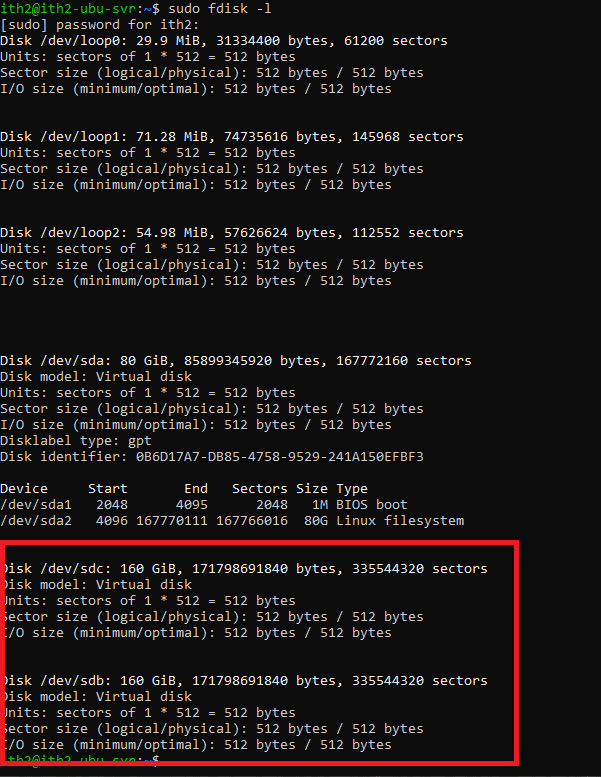
From the output above we can see that the disks that I want to add to the pool are /dev/sdb and /dev/sdc.
The ZFS pool (ith2-zfs) is then created using the following command:
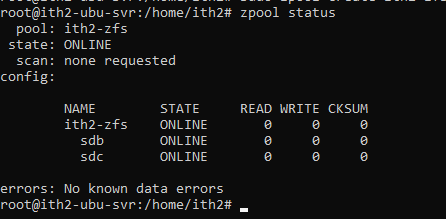
sudo zpool create ith2-zfs /dev/sdb /dev/sdcThe status of the new pool can be found by running:
zpool statusThe will show the pool, the disks in the pool and the status of the disks in the pool:
Show the space in the pool by running:
zpool list
The newly created pool will be automatically mounted for you and it is already formatted so the pool is ready to use. The new zpool can been seen by running dh -f:
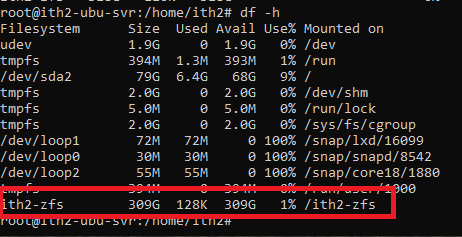
From the screenshot above you can see that the ith2-zfs zpool is mounted as /ith2-zfs.
If you want to just show the new zpool you can run the following command:
df -hT | grep zfs
If you would like to add another disk (/dev/sdd) to the zpool you can add it using the zpool add command and then showing the zpool status again:
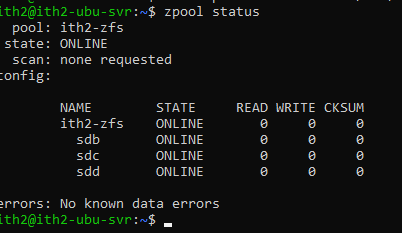
You will now see that the pool is now larger too:

The zpool can be deleted at any time by running the zpool delete command (BE VERY CAREFUL WHEN USING THIS COMMAND!!!)
sudo zpool destroy ith2-zfsIf you then run the zpool list you will now see that no zpools exist:

3. Zpool with RAID:
ZFS pools can also be created with the RAID (Raid0, Raid1 and Raid5):
RAID0
The example above is and example of RAID0. In the case of RAID 0 zpools, you can’t remove any disk from the pool without destroying the pool entirely and losing all data. ZFS has many different options, some of which allow for the removal or failure of disks while still maintaining the integrity of the pool.
RAID1 (Mirror)
RAID1 gives you redundancy because all your data is mirrored from one hard disk to one or more others, with a Mirrored (RAID1) zpool a faulty disk can be removed from the pool and replaced without the pool being destroyed as the disks are mirrored.
A Raid1 zpool can be created by running the following command:
sudo zpool create ith2-zfs-mirror mirror /dev/sdb /dev/sdc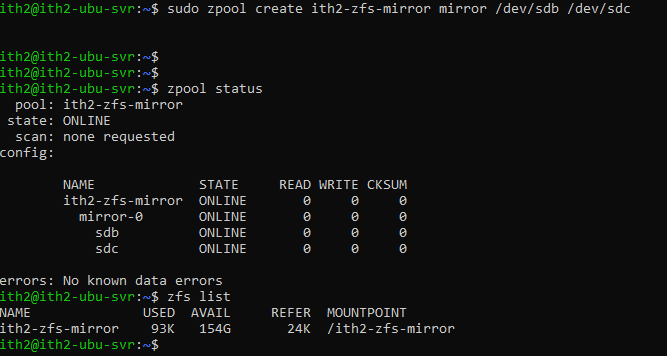
As with any other RAID1 array the zpool loses half of the disk space as the drives are mirrored.

RAID5
ZFS Raid has RAID-Z which is equivalent to RAID5, but improves upon it with better speed and avoiding some of the common errors associated with RAID 5.
RAID-Z will give you speed plus redundancy by using block level striping and distributed parity. There are three types of RAID-Z available, depending on how much parity you want.
- raidz1 (or just raidz) – single parity
- raidz2 – double parity
- raidz3 – triple parity
Here’s how you can create a RAID-Z pool. Use raidz2 or raidz3 in place of of raidz in this command if you want more parity (keep in mind you’ll also need additional disks in that case):
So for single parity the command would be:
sudo zpool create ith2-zfs-raid-1p raidz /dev/sdb /dev/sdc /dev/sddFor double parity the command would be:
sudo zpool create ith2-zfs-raid-2p raidz2 /dev/sdb /dev/sdc /dev/sddAnd for tripple parity the command would be:
sudo zpool create ithe-zfs-raid-3p raidz /dev/sdb /dev/sdc /dev/sddFor more information on zfs raid-z take a look at this blog post by Oracle.